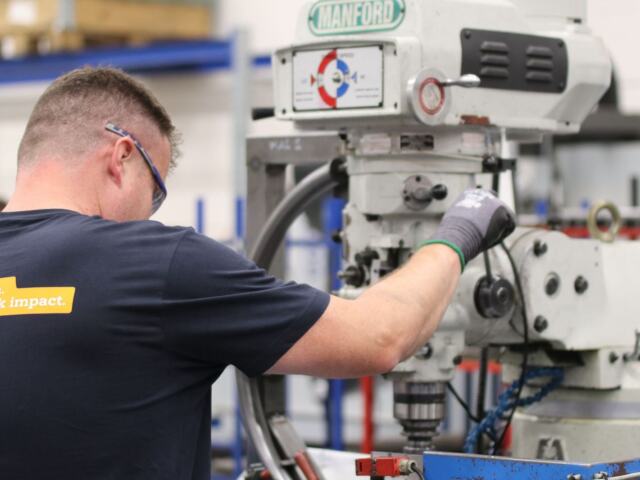
Staring at a plant full of equipment and no plan? Here is how to create a preventive maintenance schedule: list your assets, rank them by criticality, set task intervals from manufacturer guidance, then review the results.
| Item | Value |
|---|---|
| Preventive maintenance | Performs repairs on a time-based or predetermined schedule |
| Reactive maintenance | Occurs after a building component fails |
| Predictive maintenance | Initiates repairs only when necessary, based on periodic monitoring |
| Inputs for frequency | Manufacturer recommendations, usage patterns, historical performance data |
| Camcode guide structure | Eight steps |
These definitions come from the NJ Green Building Manual and a vendor guide from Camcode. Both pages can change, so check the sources before you rely on them.
What a preventive maintenance schedule is
A preventive maintenance schedule is a planned calendar of inspections and servicing, run before equipment fails. The NJ Green Building Manual describes preventative maintenance as actions that extend useful life by performing regularly scheduled repairs before apparent problems occur.
It sits between two other approaches. Reactive work waits for a breakdown, and predictive work waits for monitoring data to show wear. Most plants use a mix, and the schedule covers the time-based part.
Scheduling this work is part of running a plant well. For the wider picture, see our guide to industrial business management.
Step 1: Build the asset list
You cannot schedule what you have not listed. Walk the site and record every piece of equipment that needs care.
- Name, location and unique ID
- Manufacturer, model and serial number
- Purchase date and expected life, where known
- Where the manual or service documents are kept
A spreadsheet is enough to start. A maintenance software system (CMMS) can come later, once the data is clean.
Step 2: Rank assets by criticality
You will not have time to give every asset the same attention. Rank each one by what happens if it stops: lost output, safety risk, or cost of repair.
- High: a stoppage halts production or creates a safety hazard.
- Medium: a stoppage slows work, but a workaround exists.
- Low: a stoppage is a nuisance, and repair can wait.
Start your schedule with the high group. Add the rest as your team gains rhythm.
Ask operators and technicians to help with the ranking. They know which machines cause trouble, which have no spare, and which ones have a long wait for parts. Those details often change a ranking that looked obvious on paper.
Write down the reason for each rating. When equipment, products or demand change, you can revisit the ranking quickly instead of starting over.
Step 3: Define tasks and set frequencies
Begin with the maker’s manual for each asset. The Camcode guide says that frequency is determined based on the manufacturer’s recommendations, equipment usage patterns, and historical performance data.
Usage patterns and historical performance data are also inputs, so record why you set each interval as you do.

Write each task as a short instruction a technician can follow without guessing. Typical tasks include:
- Visual inspection for leaks, wear and loose fittings
- Lubrication to the specified grease or oil
- Filter and belt changes
- Calibration and safety checks
Include the tools, parts and safety steps with each task, such as lockout before work on moving or powered equipment. A technician who has to hunt for a filter or a procedure will lose time, and may skip the job.
You can trigger a task by calendar date or by usage, such as run hours. Usage triggers suit machines with uneven workloads.
Step 4: Assign, schedule and track
Each task needs an owner, a due date and a way to show it was done. Group tasks by area or shutdown window so that one stop covers several jobs.
Track a few fields for every task: asset ID, task, frequency, trigger type, last completed and next due. Keep a record of parts used and time taken, because that history is what lets you improve intervals later.
Planning and scheduling work belongs with production planning too. Our piece on operations management in manufacturing covers how those pieces fit together.
Step 5: Review and adjust
A first schedule is a draft. Look at completed work orders and breakdowns on a regular cadence, and ask which tasks found nothing and which failures slipped through.
- Shorten them where wear shows up between visits.
- Add tasks for failures that recur.
- Drop tasks that no longer match the equipment.
If an outside contractor handles some of the work, the scope and response times should be in writing. See how to write a maintenance service contract for what to cover.
A worked example: one air compressor
Take a compressor that feeds a packaging line. It is high criticality, because when it stops, the line stops. The manual lists tasks for filters, oil, belts, drains and safety valves, each with a suggested interval.
You turn that into a small set of recurring jobs. A daily walk-round checks for noise, leaks and unusual heat. Weekly tasks cover drains and belt condition. Longer-cycle tasks cover filters, oil and safety valve testing, with dates tied to run hours rather than the calendar.
After a few cycles, your records show that the intake filter clogs early in dusty months. You shorten that one interval and leave the rest alone. That small adjustment is the whole point of reviewing the schedule.
Common mistakes to avoid
Most failed schedules fail for ordinary reasons, not technical ones. Watch for these:
- Too much, too soon. A schedule covering every asset on day one overwhelms the team, and tasks get skipped. Begin with the critical group.
- Vague tasks. “Check pump” means different things to different people. Say what to check, what is normal and what to do if it is not.
- No owner. A task assigned to “maintenance” is assigned to nobody. Name a person or a role.
- No feedback loop. If technicians cannot record what they found, the schedule never improves.
- Ignoring production. If operators cannot release the machine, the work slips. Agree downtime windows with the people who run the line.
Keeping the schedule alive
A schedule only helps if the work gets done. Track how many scheduled tasks were completed on time, and look at the reasons for the ones that were not.
Share the results with operators and supervisors. When people see that a missed lubrication task led to a stoppage, the schedule stops feeling like paperwork.
Keep the documents simple enough that a new technician can follow them in their first week. Store manuals, task lists and history in one place, and make sure everyone knows where it is.
Frequently asked questions
Where should I start if I have no records?
Show answer
Start with the most critical assets and their manuals. Use the manufacturer’s recommended intervals as a baseline, then adjust once you have your own history.
Do I need maintenance software?
Show answer
No. A spreadsheet can run a small schedule. Software helps once the number of assets and tasks makes manual tracking error-prone.
How is preventive different from predictive maintenance?
Show answer
Preventive work follows a time-based or predetermined schedule. Predictive work is triggered by monitoring, as the NJ Green Building Manual describes it.
How often should I update the schedule?
Show answer
Review it on a regular cadence and after any major failure, equipment change or change in how hard the machines are used.